In this blog we ‘ll learn about AWS ECR(Elastic Container Registry). If we are working with docker then this is the service that we use mostly in aws. AWS ECR is use to store docker images on one place. ECR allows developer to store, manage and deploy docker images securely.
Let’s see how we can use ECR service. In this blog we ‘ll cover a complete example from development to deployment of docker images to ECR.
Project Explanation
First see what we are going to do in this blog. We ‘ll create a spring boot project and we ‘ll create the docker image of this project. After this we ‘ll see how can we push this docker image to ECR. Let’s see it step by step.
- Create a spring boot project
- Create Docker image of this project
- Creation of ECR Repository
- Login to ECR Repository from local system using aws cli.
- Push Docker image to ECR Repository
- Validate ECR repository if image successfully pushed or not
- Pull the docker image from ECR.
- Run the docker image and see the rest endpoint response.
We ‘ll cover both the way (via UI and via Commands) for creating ECR. First we ‘ll follow the UI way so you can get the understanding of the ECR. Then we ‘ll show the commands for same process.
Prerequisite for this project
Below are some prerequisite for this project. If you don’t have any knowledge about these no needs to worry we ‘ll cover from very basic. Providing the link for some blogs so you can get inside of the topic very quickly.
- Knowledge about docker. If you don’t know about this you can follow our blog for quick understanding. It ‘ll cover first two point (creation of spring boot project and create docker image of this project). Follow Link for Docker understanding.
- Basic understanding of aws cli. AWS cli must be install on your system if you want to create the ECR(Elastic Container Registry) else you ‘ll not be able to create from command line. If you are looking only with UI flow for ECR creation then no need to worry. You can see our blog if you want to install AWS cli on your local system. Follow Link for AWS CLI.
Go step by step now. Let’s create a spring boot project then we create the docker image for this project. You can skip this part if you have any docker image. We are creating spring boot project you can create any project as per your choice like NodeJS or other we just need the Docker image.
Create Spring Boot project and make docker image
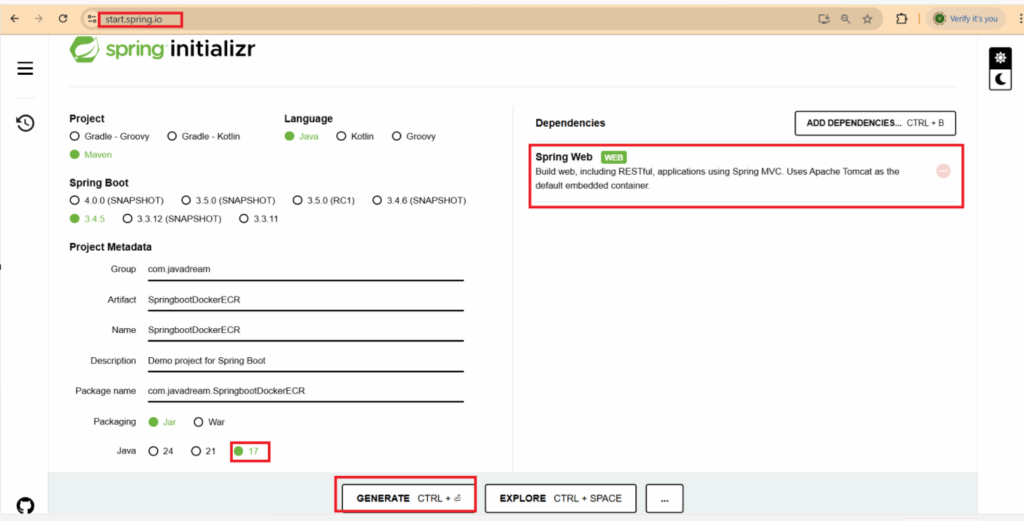
We ‘ll create a simple spring boot project from start.spring.io. We are including only web dependency as we ‘ll create a GET rest endpoint. So once we run our docker image we can validate it by accessing our rest endpoint.
We are not going into depth for creating the docker image. You can refer to this blog for more understanding Spring boot docker integration.
Import the project in your IDE and create a controller class and expose a GET rest endpoint with some simple string as response.
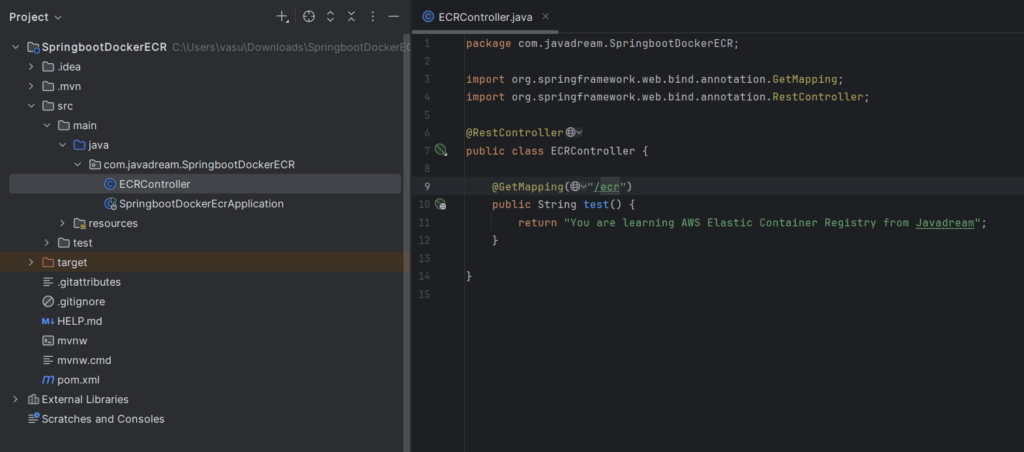
We have exposed one GET rest endpoint. When we access this we ‘ll get the response. You are thinking why we are creating the endpoint here. Because when we create the docker image and run that then we ‘ll access this endpoint to test that our docker image is working fine or not.
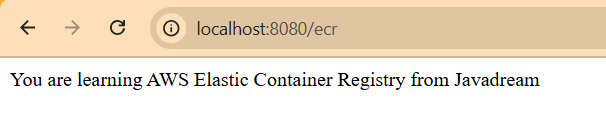
If you call this API you ‘ll get the response like below screenshot.
Now create a file with name Dockerfile in your project root and build that image with docker build command to create the docker image of our spring boot porject.
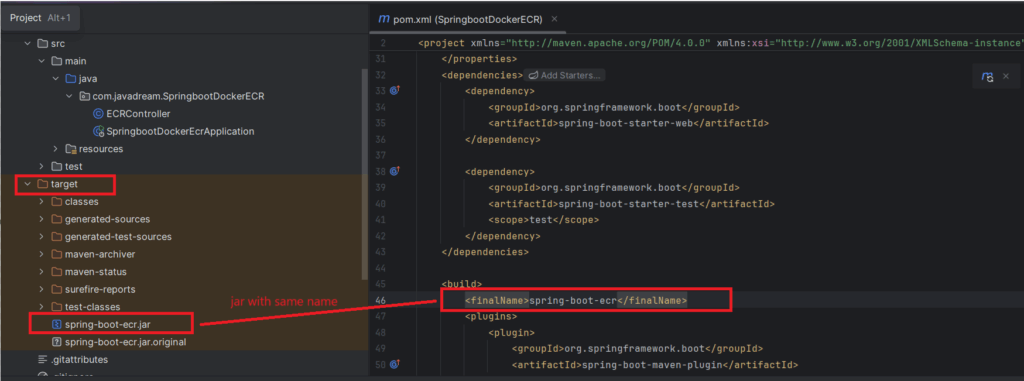
One more thing to remember your jar name. we ‘ll use <finalName> tag in our pom.xml file for generating the custom jar name. Let’s do the change and run the mvn clean install command and see your target folder. You ‘ll see the jar name that you define inside <finalName> tag.
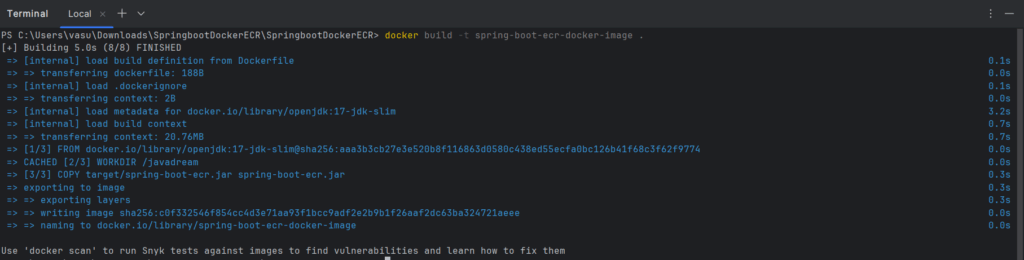
Now create a docker file and create docker image using docker build command. Once image created use docker images command to verify image successfully created or not.


We have our docker image ready now let’s see how we ‘ll create Elastic container registry repository on AWS and push our image.
Create Elastic Container Registry (ECR) repository on AWS and push docker image to ECR
First we ‘ll see via AWS portal. We ‘ll create ECR repository through AWS portal and we ‘ll login to the ECR repository from our local system via AWS CLI and push our docker image to ECR. We ‘ll cover this step by step let’s start.
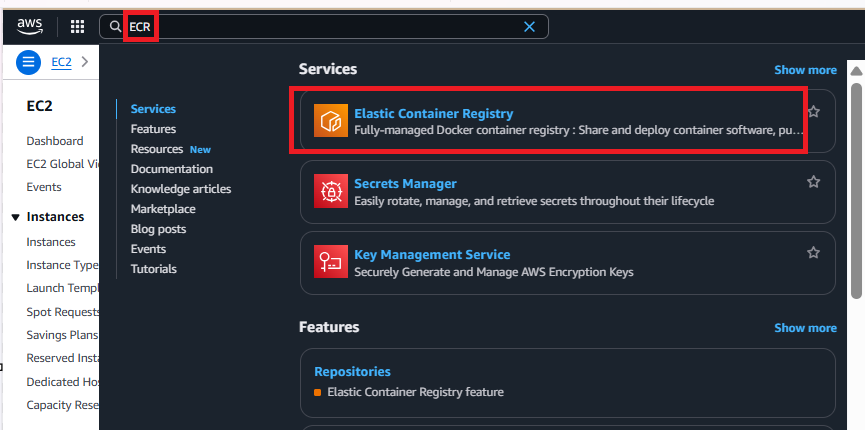
Login to aws console and search for ECR.
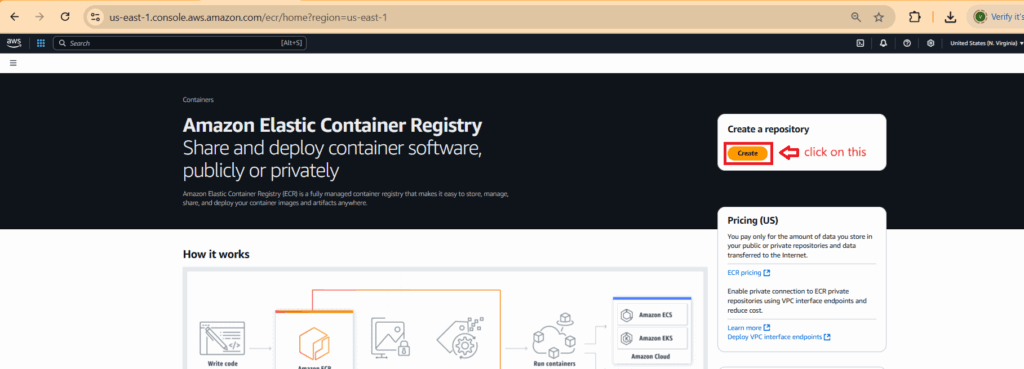
ECR window ‘ll open click on create button.
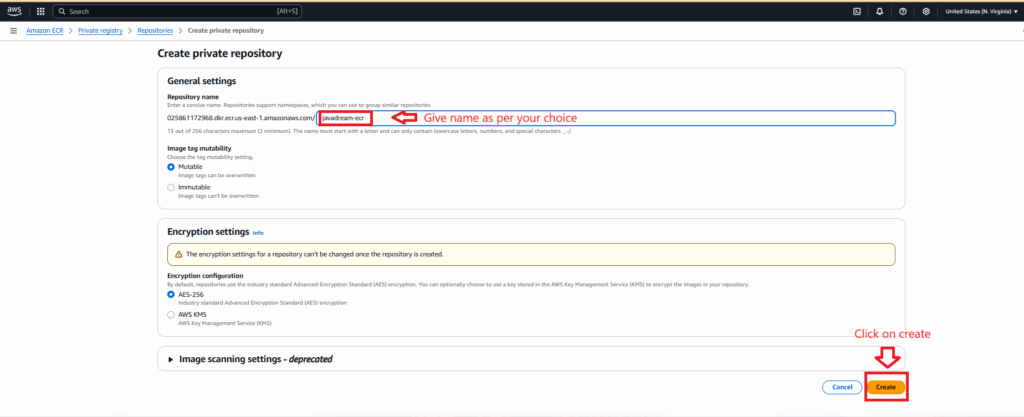
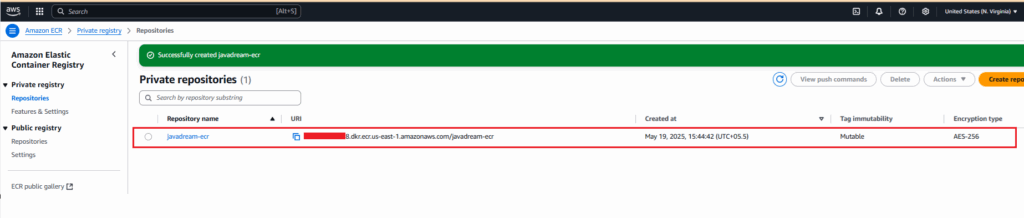
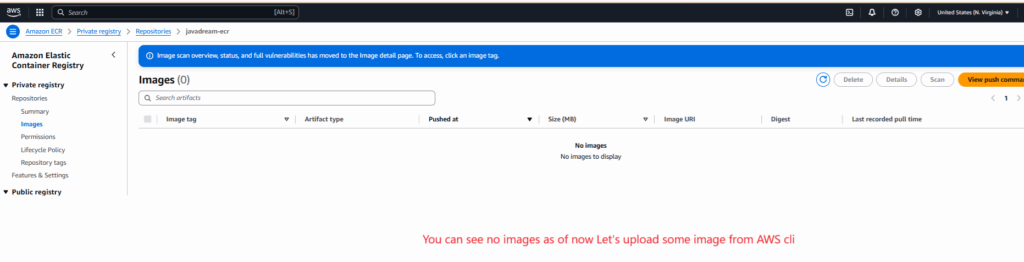
You can see we have successfully created a ECR(Elastic container registry). This is the repository where we store our docker images. You can go inside this currently we don’t have any image. Mostly the repository name same as your project name but we have created with some different name so can show you each command you ‘ll understand it better. let’s continue.
Now open you command prompt. Make sure you have AWS CLI installed. If you don’t have this follow this blog and install it Download AWS CLI.
Push Docker image to ECR via AWS CLI
Hope that you follow our blog and install the AWS CLI successfully on your local system. If you follow our blog you have already configure the aws user access and secret key if not please refer to the blog and do that.
Now open your command prompt and run the below command to see aws user access and secret key configured succesfully.
aws configure listCode language: PHP (php)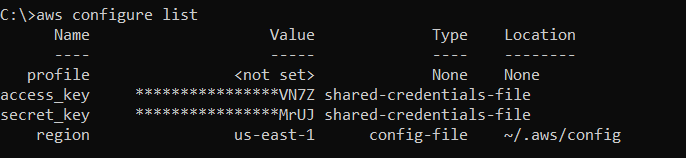
Run below command to see your user identity.
aws sts get-caller-identityCode language: JavaScript (javascript)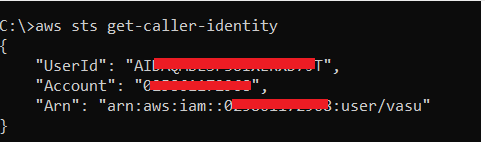
Run below command to see all the ECR (Elastic Container Registry) repository list. When you run this command if you are a root user then all good else you ‘ll get a error. Let’s see run below command to list all ECR repository list.
aws ecr describe-repositories --region us-east-1
We get this error because we need some permission to access ECR repository. If you are not getting this error means you already have required permission for your user. But if you are getting let’s fix this by providing the permission. We need to provide the AmazonEC2ContainerRegistryFullAccess permission to user. Let’s see how we can provide the permission to our user.
Give ECR permission to user
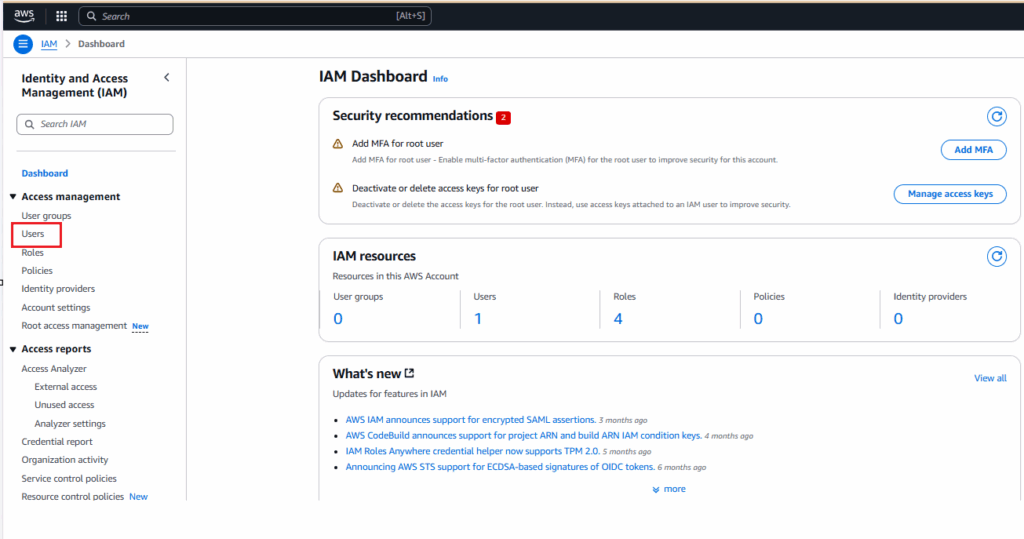
1- Search for IAM on AWS console.

2- On left navigation click on Users.
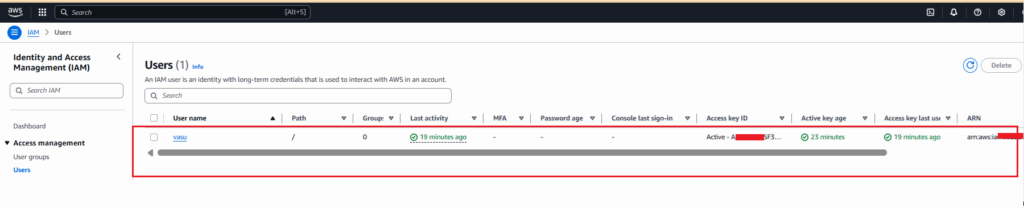
3- Click on your user.
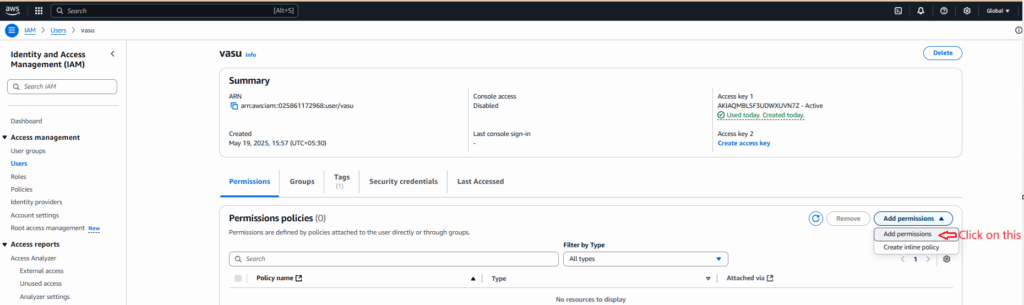
4- Select Add permission button.
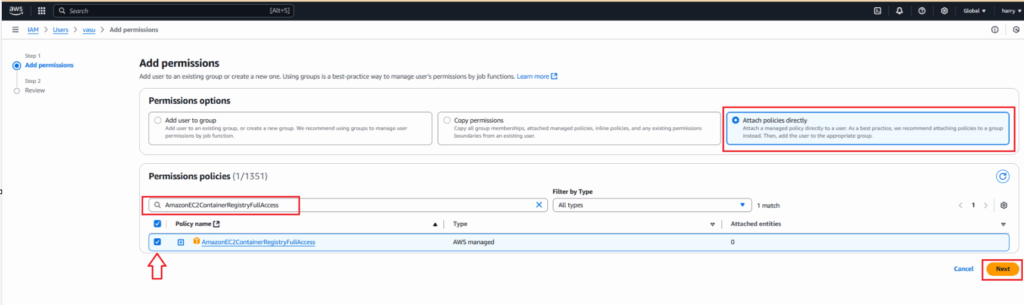
5- Select Attach policy directly. On search box type AmazonEC2ContainerRegistryFullAccess. Click on the checkbox after that click on Next button.
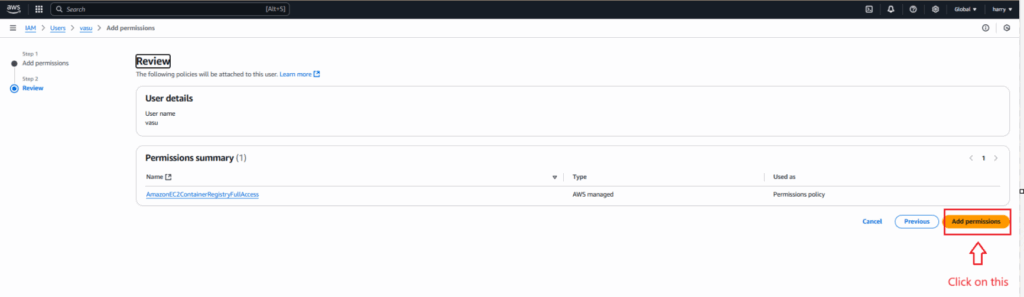
6- Click on Add permission button.
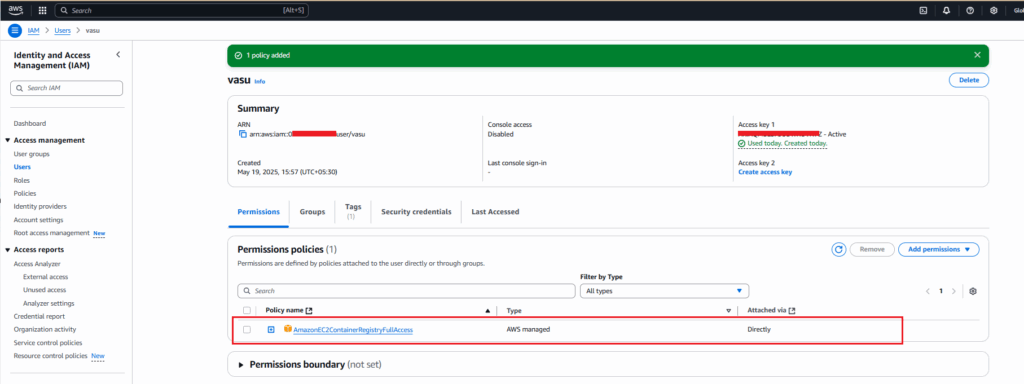
7- It’s completed. We have successfully added permission to our user. you can verify on the users page.
Now run the first command to list all the ECR repository list. As we have added the permission to our user so we must see the repository list now. As we have created one ECR repository we ‘ll see the response of that. Just run below command.
aws ecr describe-repositories --region us-east-1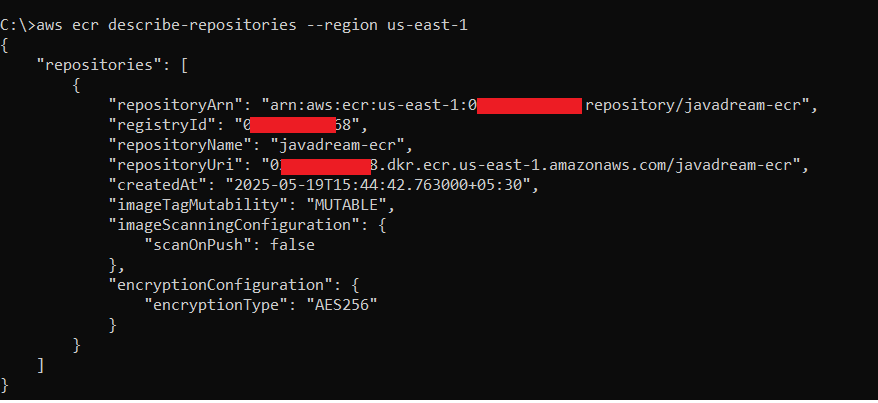
Make sure you select the region correctly. As we created our ECR repository in us-east-1 so it’s coming if we put any other region it ‘ll not come. So make sure you ‘ll choose the right region. Let’s try to put some wrong region and see the output we ‘ll not get any response.

See we haven’t got any repository because we created only one and that is in us-east-1 region.
Push Docker image to ECR
We have everything setup now. It’s time to push our docker image to ECR. Before pushing our docker image to ECR. We have to login to ECR first. Run the below command to login to ECR.
aws ecr get-login-password --region us-east-1 | docker login --username AWS --password-stdin <ecr-repository-uri>Code language: HTML, XML (xml)Run the above command. In place of <ecr-repository-uri>put your ecr URI before slash ( / ). This command generates a token and using this token we are able to login to ECR. This token is valid upto 12 hours. After 12 hours you have to retrigger this command. You ‘ll see Login successful after running above command. Follow below screenshot for reference.
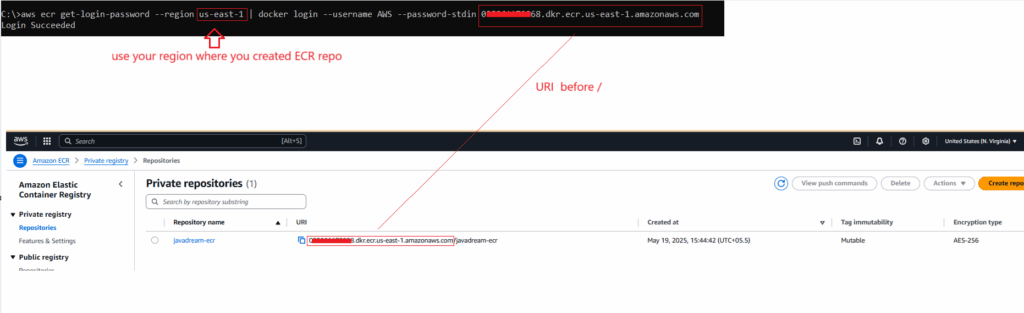

See the response means you are logged in now and can push your docker image.

before pushing the image we have to tag the docker image. Let’s tag the image first.
1- Run docker images command to display all the images.

2- Now tag this image using below command. After running below command just run the docker images command you ‘ll see our tagged image in the list.
docker tag spring-boot-ecr-docker-image:latest 021861177958.dkr.ecr.us-east-1.amazonaws.com/javadream-ecr:1.0.0
3- Run below command to push the image to ECR.
docker push 021861177958.dkr.ecr.us-east-1.amazonaws.com/javadream-ecr:1.0.0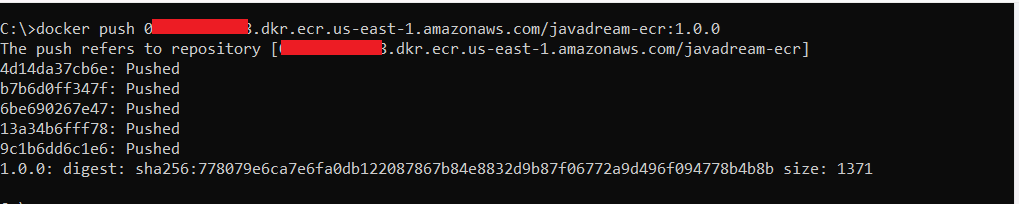
4- We are done just go inside your ECR repository then refresh the page. You ‘ll get the image listed there.

Creating ECR repository using commands
We have seen the ECR via AWS console. But we are developer we rarely interact with AWS console. Mostly we work with command line. WE have seen all the command for login to ECR and push the image.
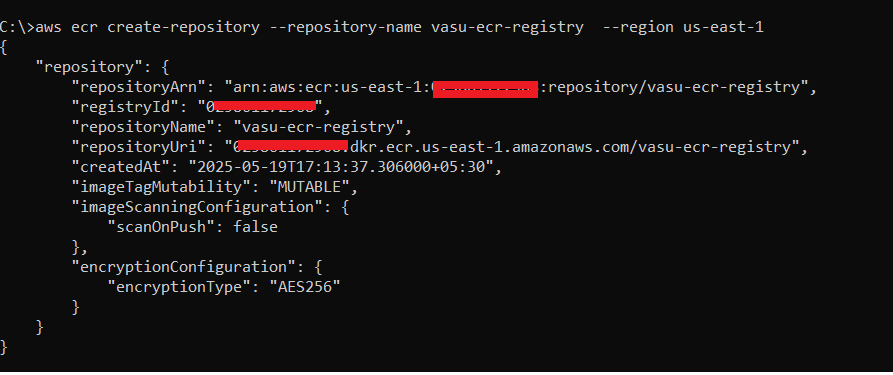
But we created the ECR via AWS console let’s see how can we create the ECR using commands. run the below command to create the ECR repository.
aws ecr create-repository --repository-name vasu-ecr-registry --region us-east-1We are creating ECR repository with name vasu-ecr-registry. after running above command you ‘ll get the response like below screenshot.
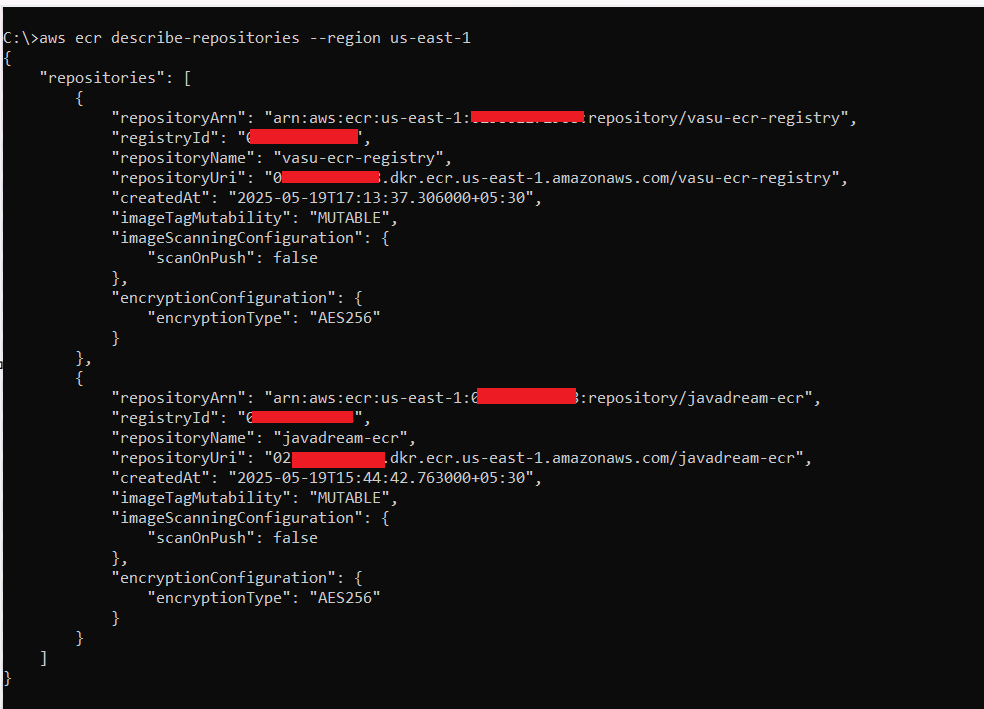
Now run the command to list all the ECR repository. Now you ‘ll see two result in response in us-east-1 region.
If we want to delete the ECR repository we run the below command. But we have to make sure that images are not there. If ECR contains images this command give the error.
aws ecr delete-repository --repository-name javadream-ecr --region us-east-1Code language: JavaScript (javascript)
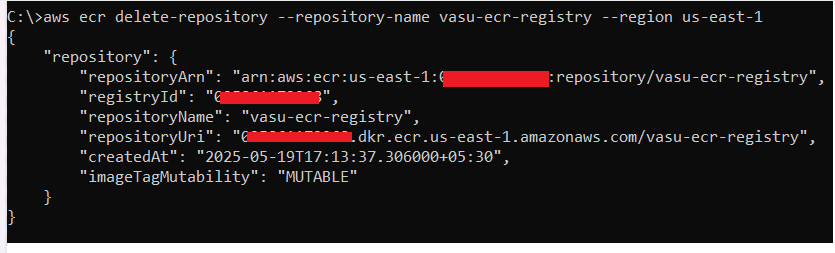
Let’s try to delete other repository that we created recently that does not contains any image.
aws ecr delete-repository –repository-name vasu-ecr-registry –region us-east-1
Pull and run the docker image.
We use below command to pull the image from ECR.
docker pull <ECR_repository_URI:tag_version>Code language: HTML, XML (xml)docker run -p8080:8080 <image_name>Code language: HTML, XML (xml)After running the above command docker run a docker container ‘ll start with this image and you can check the GET rest endpoint that we created. You ‘ll see the response while you hit the API.
Hope you enjoy this blog. If you like it please share it with others and help us to grow. Please share your feedback in comment section.
If you need blog on any specific topic. Please put it in comment section we ‘ll try our best to cover that topic.