In this blog we ‘ll learn about Spring boot actuator. We use Spring boot actuator to monitor our application. It helps us to check health status of our application on production environment.
Spring boot actuator provides many build-in API’s. When we use actuator in our spring boot application, by default only health endpoint is enabled. As we have mentioned actuator provides many endpoint using which we can get most of the information about our application. To use those API’s we have to enable them. We ‘ll see how we can enable those spring boot actuator endpoints while we start coding.
We can also pass these information or say matrices of information about our application to third party application like Kibana, for getting more visualize information about our application status and other bean and JVM metrices.
How to use spring boot actuator endpoints
Spring boot actuator endpoints is very simple to use. We just have to follow below steps.
- Add actuator dependency in pom.xml file.
<dependency>
  <groupId>org.springframework.boot</groupId>
  <artifactId>spring-boot-starter-actuator</artifactId>
</dependency>Code language: HTML, XML (xml)- Run your spring boot application.
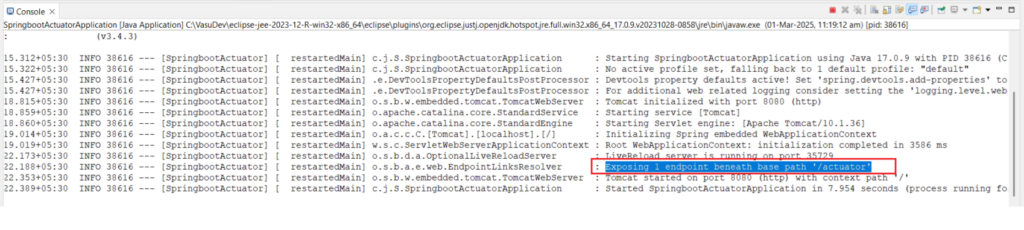
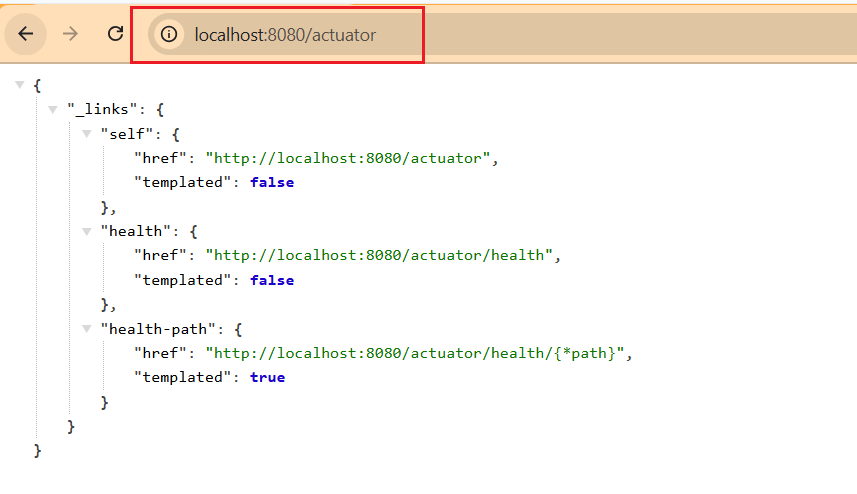
Look how easy to use actuator in spring boot application. By default actuator endpoint are available on /actuator endpoint.
Enabling spring boot actuator endpoints
As of now we are seeing only /health endpoint is enable on /actuator endpoint. If we want to see all other actuator endpoints so there are two ways either we can expose all actuator endpoint or we can just expose the specific actuator endpoint as per our need. We ‘ll see both way.
Enable all actuator endpoint
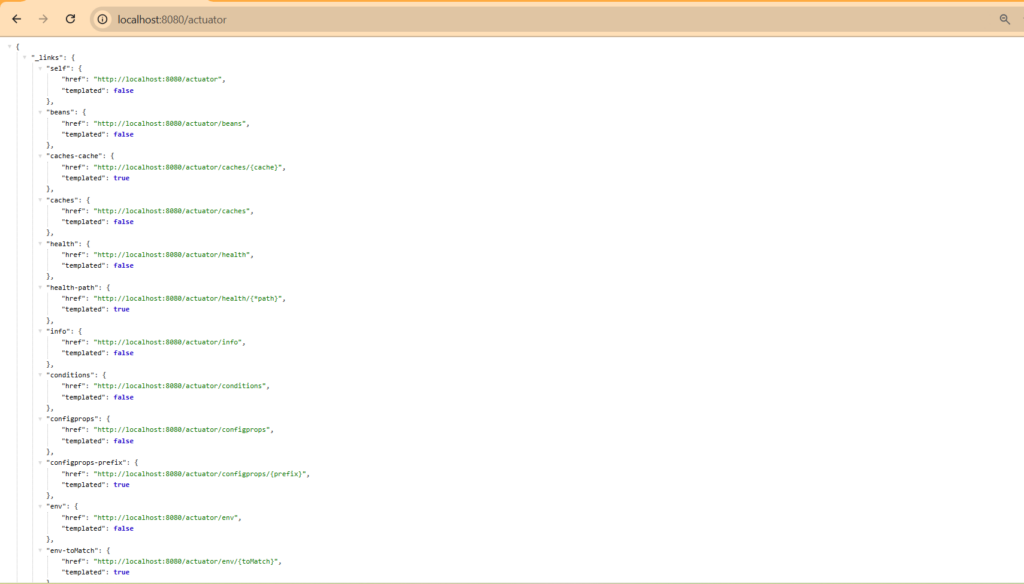
We already know that by default only /health endpoint of actuator is enables. So if we want to enable all the actuator endpoint we need to add below property in our applications.properties file.
management.endpoints.web.exposure.include=*Code language: PHP (php)After adding above property if you re-run your application and try to access the /actuator endpoint. You ‘ll see many endpoint listed there. See below screenshot for reference
Enable specific actuator endpoint
You have seen that by adding above property in our application.properties we got many actuator endpoints. Some time we don’t need all the endpoints. What if we need some specific actuator endpoint as per our requirement. So for that we use the same property but instead of * we ‘ll provide the list of endpoints that we want to use.
Say if we want to use only health, info, metrics, beans actuator endpoint. So we just need to define these only. So for enabling specific actuator endpoint use below property in applications.properties file.
management.endpoints.web.exposure.include=health, info, metrics, beansCode language: PHP (php)Run your application and call /actuator endpoint. You ‘ll see only those actuator endpoints that you defined in the properties file.

Most common actuator endpoint
Mostly we don’t use all the endpoints provided by the actuator. Generally we use endpoints health for getting application health status, beans endpoint for getting the list of all the registered beans in our application etc. Below are some endpoints that we use most of the time in our application.
| Actuator Endpoint | Description |
/health | Shows application health status. UP means our application is up and running fine. |
/beans | List all the beans that registered in our project |
/info | Displays custom application information |
/env | Show all the environment properties use in our application |
/threaddump | It Dumps the thread information of application |
/metrics | It provides application metrics. We can forward this metrices to third party tool like Kibana for visualization. |
/loggers | It uses for viewing and modifying log levels |
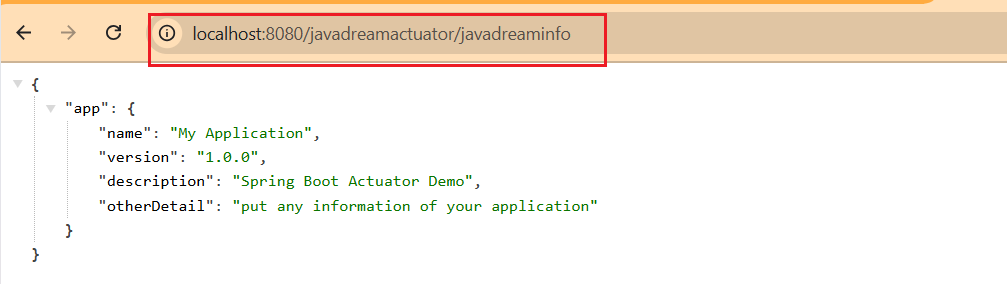
Customize Actuator info endpoint
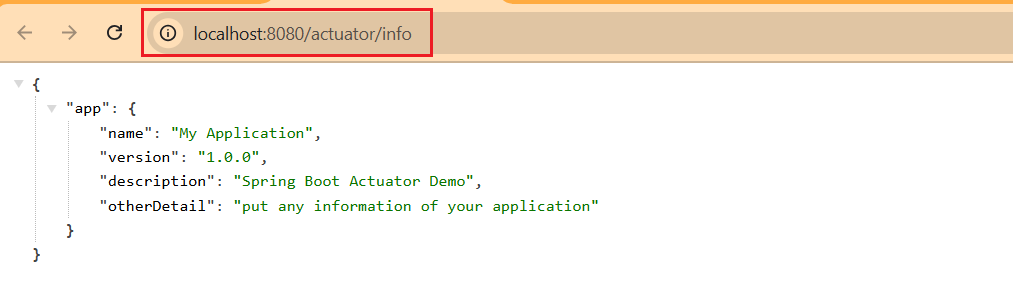
We know that /info endpoint of actuator is used to display the custom information about the application. While we access /info actuator endpoint we get the blank response. So if we need to add any custom information about our application for example if we want to add name, version, description or any other detail about our application. We need to add below property in our applications.properties file.
management.info.env.enabled=true
info.app.name=My Application
info.app.version=1.0.0
info.app.description=Spring Boot Actuator Demo
info.app.otherDetail=put any information of your applicationCode language: JavaScript (javascript)
After adding these property re-run your application and access the /actuator/info endpoint. You ‘ll see all the information that you defined.
Monitoring API and their response time via actuator
Actuator help us to track all the API’s that are calling in our application. And it also help us to track down which API is taking long time for responding. As we know that actuator provide /metrics endpoint. And actuator track the API’s performance by the http.server.requests. So if we want to see the details of which API’s are calling and how long they are taking in our application, We ‘ll call the below actuator endpoint.
actuator/metrics/http.server.requests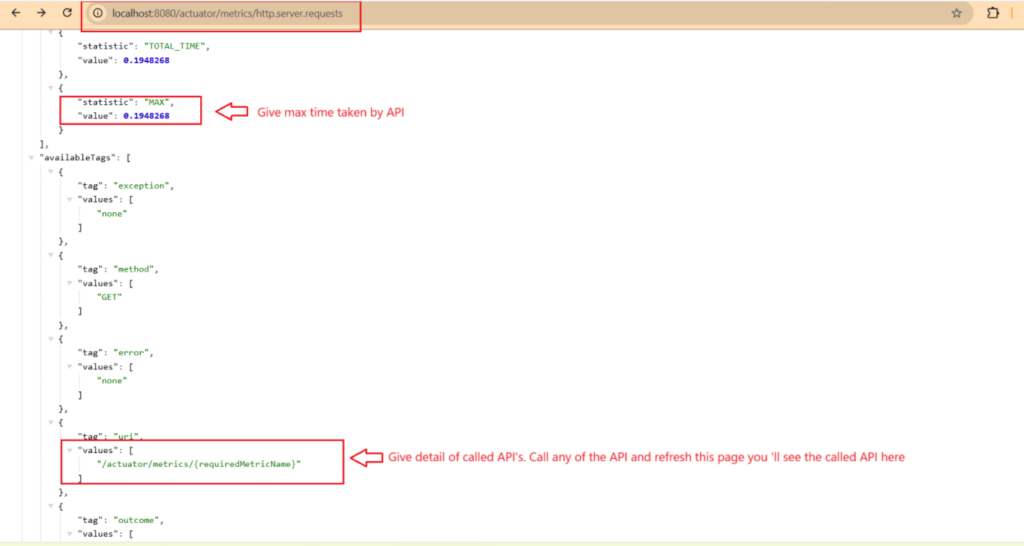
So if you call any API that details are tracked here. For example if i create a GET endpoint /javadream in our application and call that. After call the API if i refresh the actuator/metrics/http.server.requests endpoint, We can see the details of our API here.
Create a controller class and expose a GET API
package com.javadream.SpringbootActuator;

import org.springframework.web.bind.annotation.GetMapping;
import org.springframework.web.bind.annotation.RestController;

@RestController
public class ActuatorController {

	@GetMapping("/javadream")
	public String test() {
		return "Javadream Actuator Example";
	}
}
Code language: CSS (css)
Run the application and call this API.

Now refresh the actuator/metrics/http.server.requests endpoint. And see this API tracked there.

Change base path of Actuator endpoints
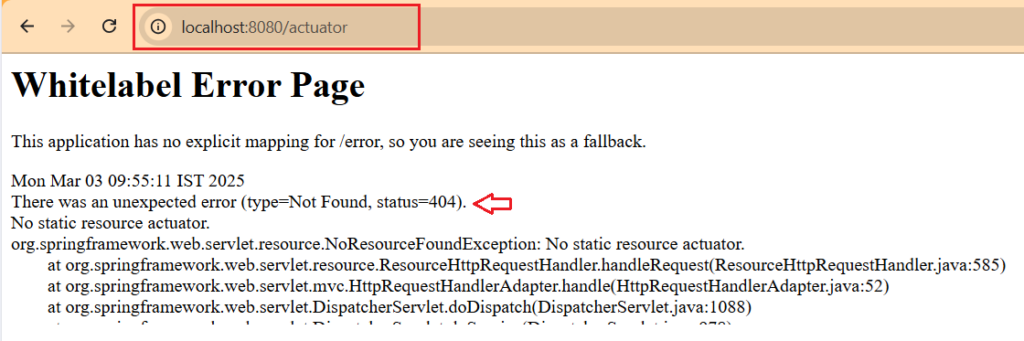
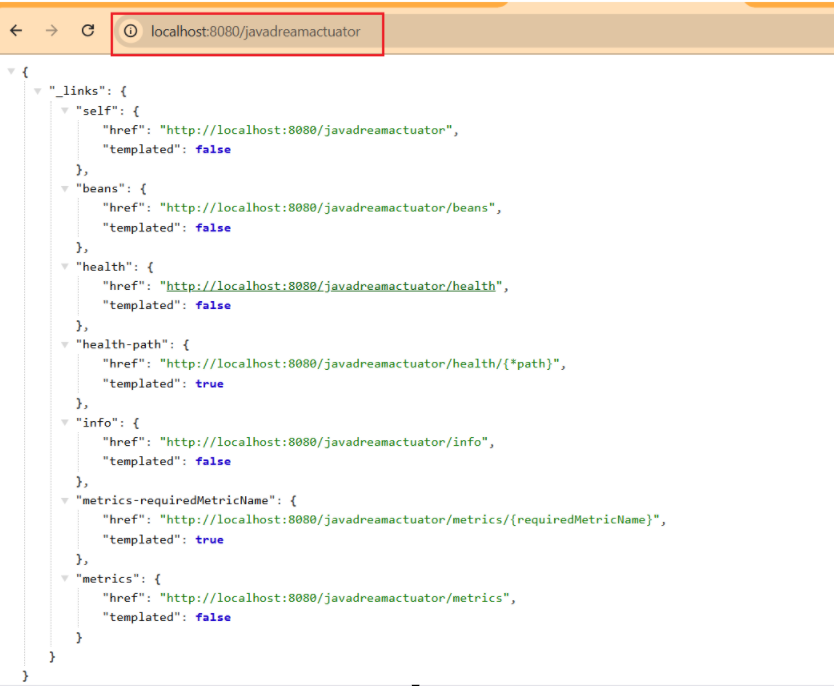
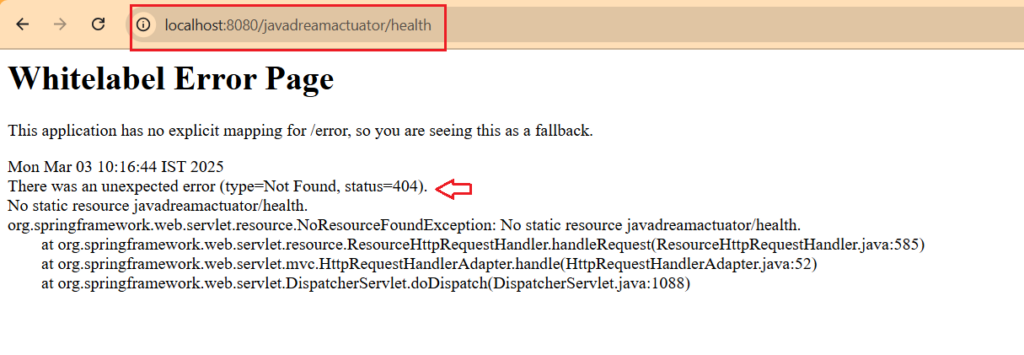
We saw that all the endpoints of the actuator is accessible by the /actuator by default in spring boot. But what if someone wants his custom path for accessing the actuator endpoints. Answer is it’s very simple to change actuator default path to some custom path. Say for example i want all the actuator endpoints are available on /javadreamactuator path. Just add below dependency in your applications.properties file and re-run your application.
management.endpoints.web.base-path=/javadreamactuatorSo after adding the above property re-run your project. If you try to access the default /actuator path you ‘ll get 404 error because you have change the base path of actuator endpoints from /actuator to /javadreamactuator.
Change specific actuator endpoint path
We have already seen that how can we change the actuator endpoint base path. But suppose if we also want to change path for specific actuator endpoint only. For example if we want to change the path of /info endpoint of actuator.
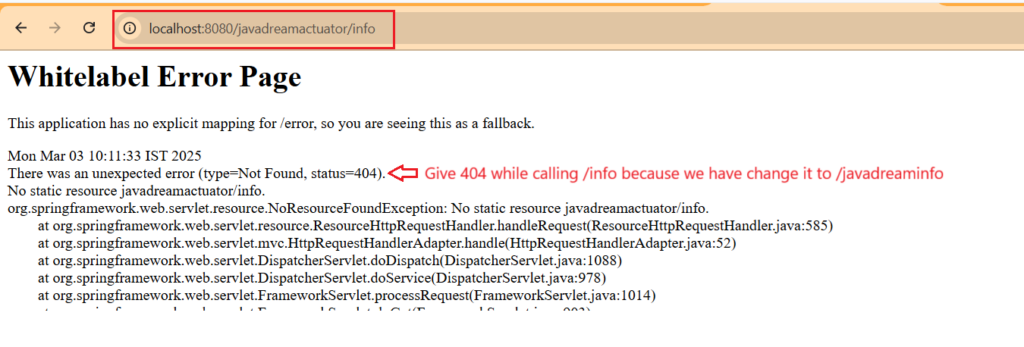
As we know that /info endpoint is accessible on /actuator/info endpoint. And if you have changed the base path of actuator so it ‘ll be accessible on /javadreamactuator/info where /javadreamactuator is the custom path change it as per the name you given.
So if i want to change this /info endpoint to something custom lets say /javadreaminfo. So to do this we have to add the below property.
management.endpoints.web.path-mapping.info=javadreaminfonow re-run your application and try to access the url.
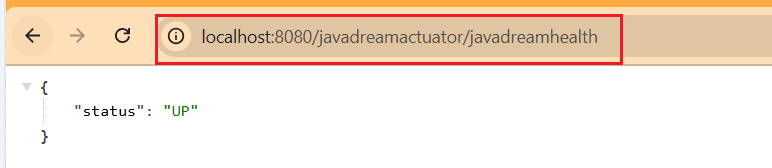
We have change the path of /info endpoint. You can change it for other specific actuator endpoint also using the same property, Just change the name in the property. For example let’s say you want to change the /health endpoint to some custom endpoint. So your property ‘ll be like
management.endpoints.web.path-mapping.health=javadreamhealthnow re-run your application and see the output of this actuator health endpoint.
Get All environment property
Actuator helps us to display the list of all the environment variable. We just make sure that we are including the env endpoint in web.exposure property.
management.endpoints.web.exposure.include=health, info, metrics, beans, envCode language: PHP (php)
Now re-run your application and try to call /env actuator endpoint. You ‘ll get the list of all the environment variables.
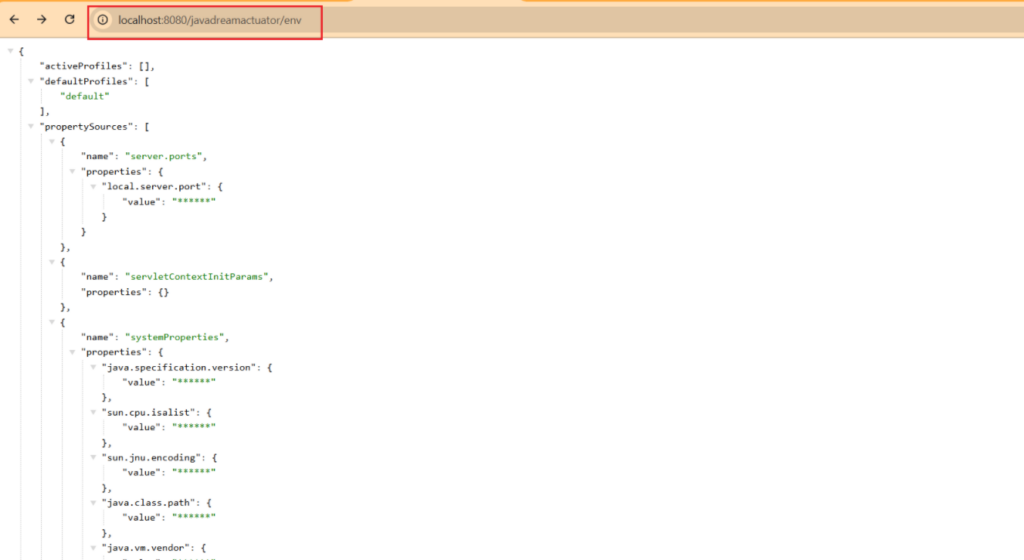
You can see we have a list of all the environment variables. If you want the value of any specific property instead of complete list. Just add the property name after /env endpoint.
Spring boot application with actuator
Now let’s create a spring boot application and see how we integrate actuator.
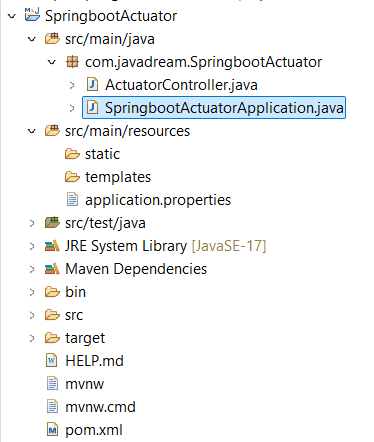
Project Structure
Add actuator dependency in pom.xml file.
<dependency>
  <groupId>org.springframework.boot</groupId>
  <artifactId>spring-boot-starter-actuator</artifactId>
</dependency>Code language: HTML, XML (xml)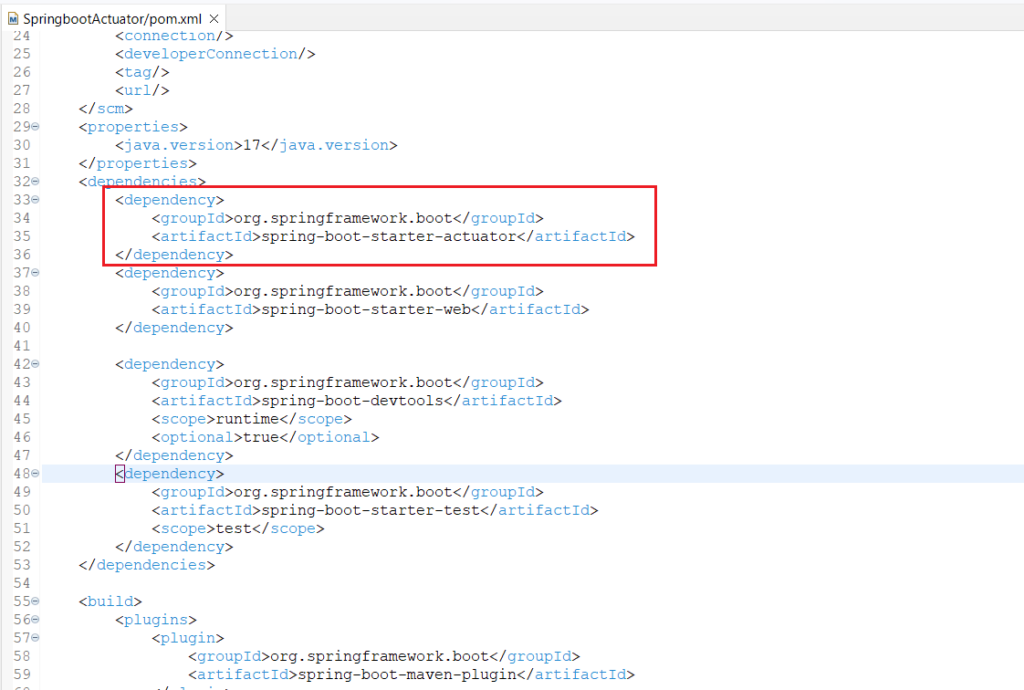
Add the actuator properties in your applications.properties or applications.yml file
spring.application.name=SpringbootActuator

# Actuator Properties
management.endpoints.web.exposure.include=health, info, metrics, beans, env

#Customized info endpoint
management.info.env.enabled=true
info.app.name=My Application
info.app.version=1.0.0
info.app.description=Spring Boot Actuator Demo
info.app.otherDetail=put any information of your application

#Custom path for actuator endpoint
management.endpoints.web.base-path=/javadreamactuator

#Specific actuator endpoint path
management.endpoints.web.path-mapping.info=javadreaminfo
management.endpoints.web.path-mapping.health=javadreamhealth
Code language: PHP (php)
We have added all the properties that we cover in this blog. Feel free to explore more properties and enhance your knowledge.
Just run your application now and play with actuator endpoints.
Download complete code from GitHub
Reference
Spring boot actuator official docs
Other blogs you may also like
Spring boot with Postgres database complete example
Spring boot Twilio integration for Sending SMS to customers
Spring boot store application secrets in Hashicorp Vault
If you like this blog please share with others.